Recording
This page walks through live datacube acquisition with HV Explorer, from connecting to a camera and setting exposure/focus to capturing references and saving the recorded scan. It is intended for push-broom scanner workflows where frame rate, belt speed, lighting, and calibration references must be configured together.
Recording interface
The Recording perspective is the starting point for live-capture workflows. Switch to it using the Perspectives selector in the top toolbar. The workspace opens the Recording Interface tab alongside the Recording Inspector panel and the live-view graphs.
Before scanning, collect two reference images using the same camera settings (exposure, gain, crop, band selection) as the main scan. These are used for reflectance calibration after the datacube is opened:
| Reference | Procedure |
|---|---|
| White reference | Scan a spectrally uniform target such as RESTAN at slow belt speed and short scan length. |
| Dark reference | Cover the lens completely and capture a short scan. |
Interface overview
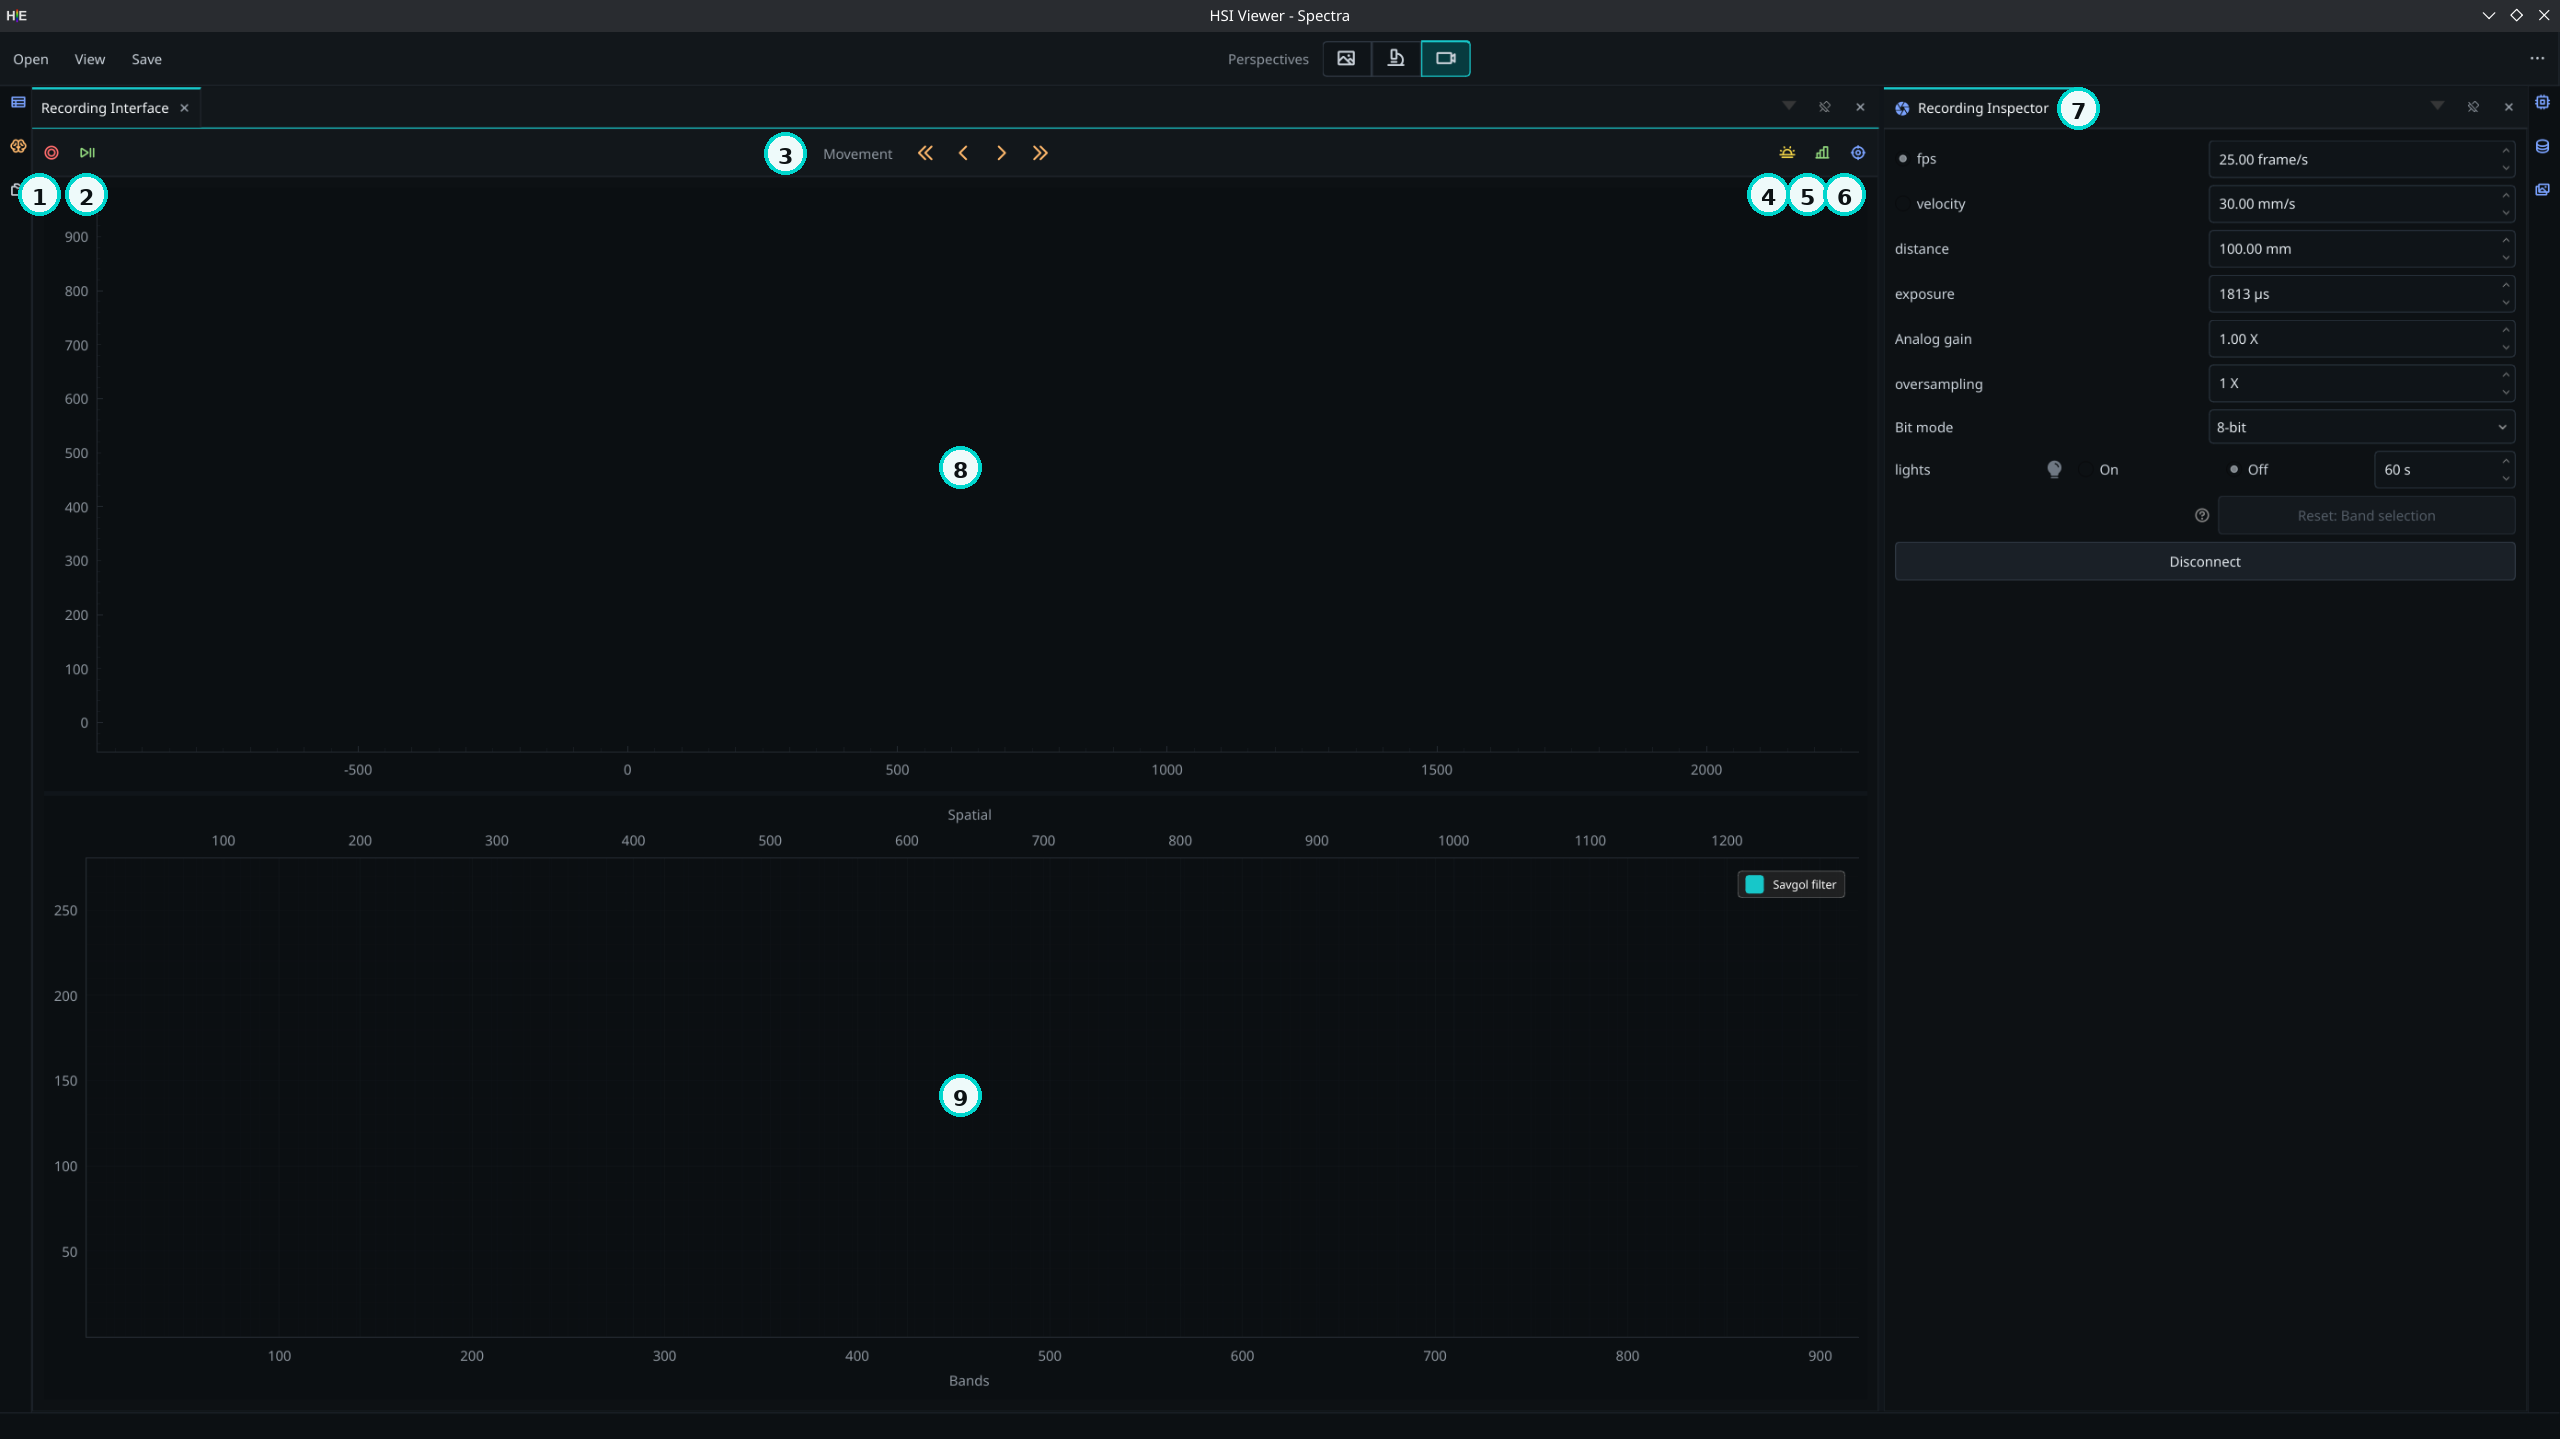
HV Explorer: recording interface
The recording workspace is divided into the live-view area on the left and the Recording Inspector panel on the right. The live-view area contains:
| # | Control | Description |
|---|---|---|
| 1 | Capture | Begins a datacube capture. |
| 2 | Stream ON/OFF | Starts or stops the live camera stream. |
| 3 | Belt controls | Adjusts belt direction and speed for the Lab Scanner. |
| 4 | Saturation overlay | Toggles the overlay used to highlight saturated pixels in the live view. |
| 5 | Histogram | Shows or hides the live histogram. |
| 6 | Variance measure | Shows or hides the spatial variance measure used during focus adjustment. |
| 7 | Recording Inspector | Camera connection and capture settings, including frame rate, velocity, exposure, gain, oversampling, bit mode, and light controls. |
| 8 | Live preview area | Displays the live camera preview while streaming. |
| 9 | Intensity graph area | Shows live intensity information used for exposure and focus adjustment. |
Recording Inspector
The Recording Inspector panel connects HV Explorer to the camera and controls all capture parameters.
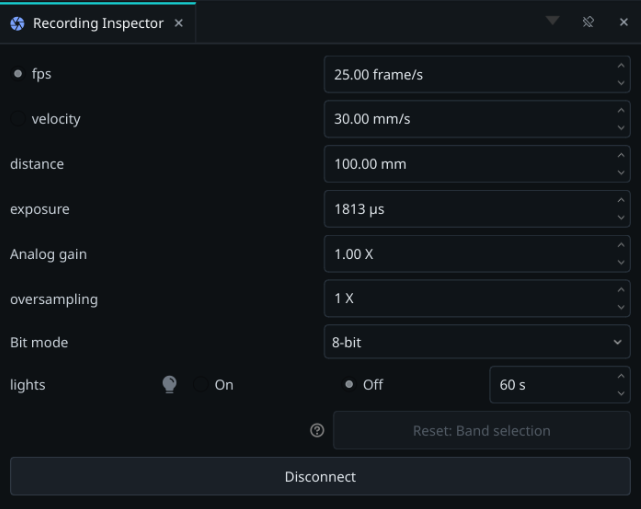
HV Explorer: recording inspector
| Setting | Description |
|---|---|
| Connect / Disconnect | Connects to or disconnects from the camera at the specified IP address. |
| Camera IP | Network address of the HV camera. |
| fps / velocity | These two settings are linked: set one and HV Explorer calculates the other using the oversampling and distance geometry to determine the total number of scan lines. Use fps when the camera frame rate is the primary constraint; use velocity when the belt speed is fixed. |
| Oversampling | Number of scan lines captured per millimeter of belt travel. The camera slit is 20 μm wide, corresponding to 4 pixels. An oversampling of 4 therefore produces a spatially correct aspect ratio; lower values produce a more compact (compressed along scan direction) cube. |
| Distance | Total scan length in millimeters. |
| Exposure | Sensor integration time in microseconds. |
| Analog gain | Amplification applied by the camera sensor. Keep this at 1× whenever possible — higher gain amplifies noise along with the signal, whereas a longer exposure generally gives a cleaner result. |
| Bit mode | Output bit depth. 8-bit allows the highest frame rates; 16-bit preserves more dynamic range but reduces the maximum achievable fps. |
| Lights | Toggles the illumination on or off, with an built-in auto-off timer. |
The camera connects over 1 Gb Ethernet, which caps the maximum sustainable data rate. The achievable fps depends on the number of bands, spatial width, and bit depth. In 8-bit mode the bandwidth budget goes twice as far as in 16-bit, so 8-bit mode is the practical choice when high frame rates are needed. If the configured fps exceeds what the link can sustain, frames will be dropped.
Workflow
A typical recording workflow follows these steps:
- Connect to the camera in the Recording Inspector and verify the camera settings.
- Stream the live view and adjust exposure and gain.
- Adjust focus by maximizing the spatial sharpness measure.
- Set belt speed or frame rate and oversampling for the desired spatial sampling.
- Capture white and dark reference images using the same camera settings as the main scan.
- Record the datacube. The cube opens automatically when capture is complete.
- Save the resulting datacube.
Capture references with the same exposure, gain, crop, and band selection as the sample scan. For the white reference, you can scan a separate RESTAN target or include the white target as the first or last rows of the sample scan (inline reference). For the dark reference, always use a lens cap so that no light reaches the sensor.
Adjusting exposure and gain
Stream the live view while pointing the camera at a white reference target to set exposure and gain. The goal is a signal that uses most of the sensor dynamic range without saturating any pixels. The live view, histogram, and saturation overlay help find this point.
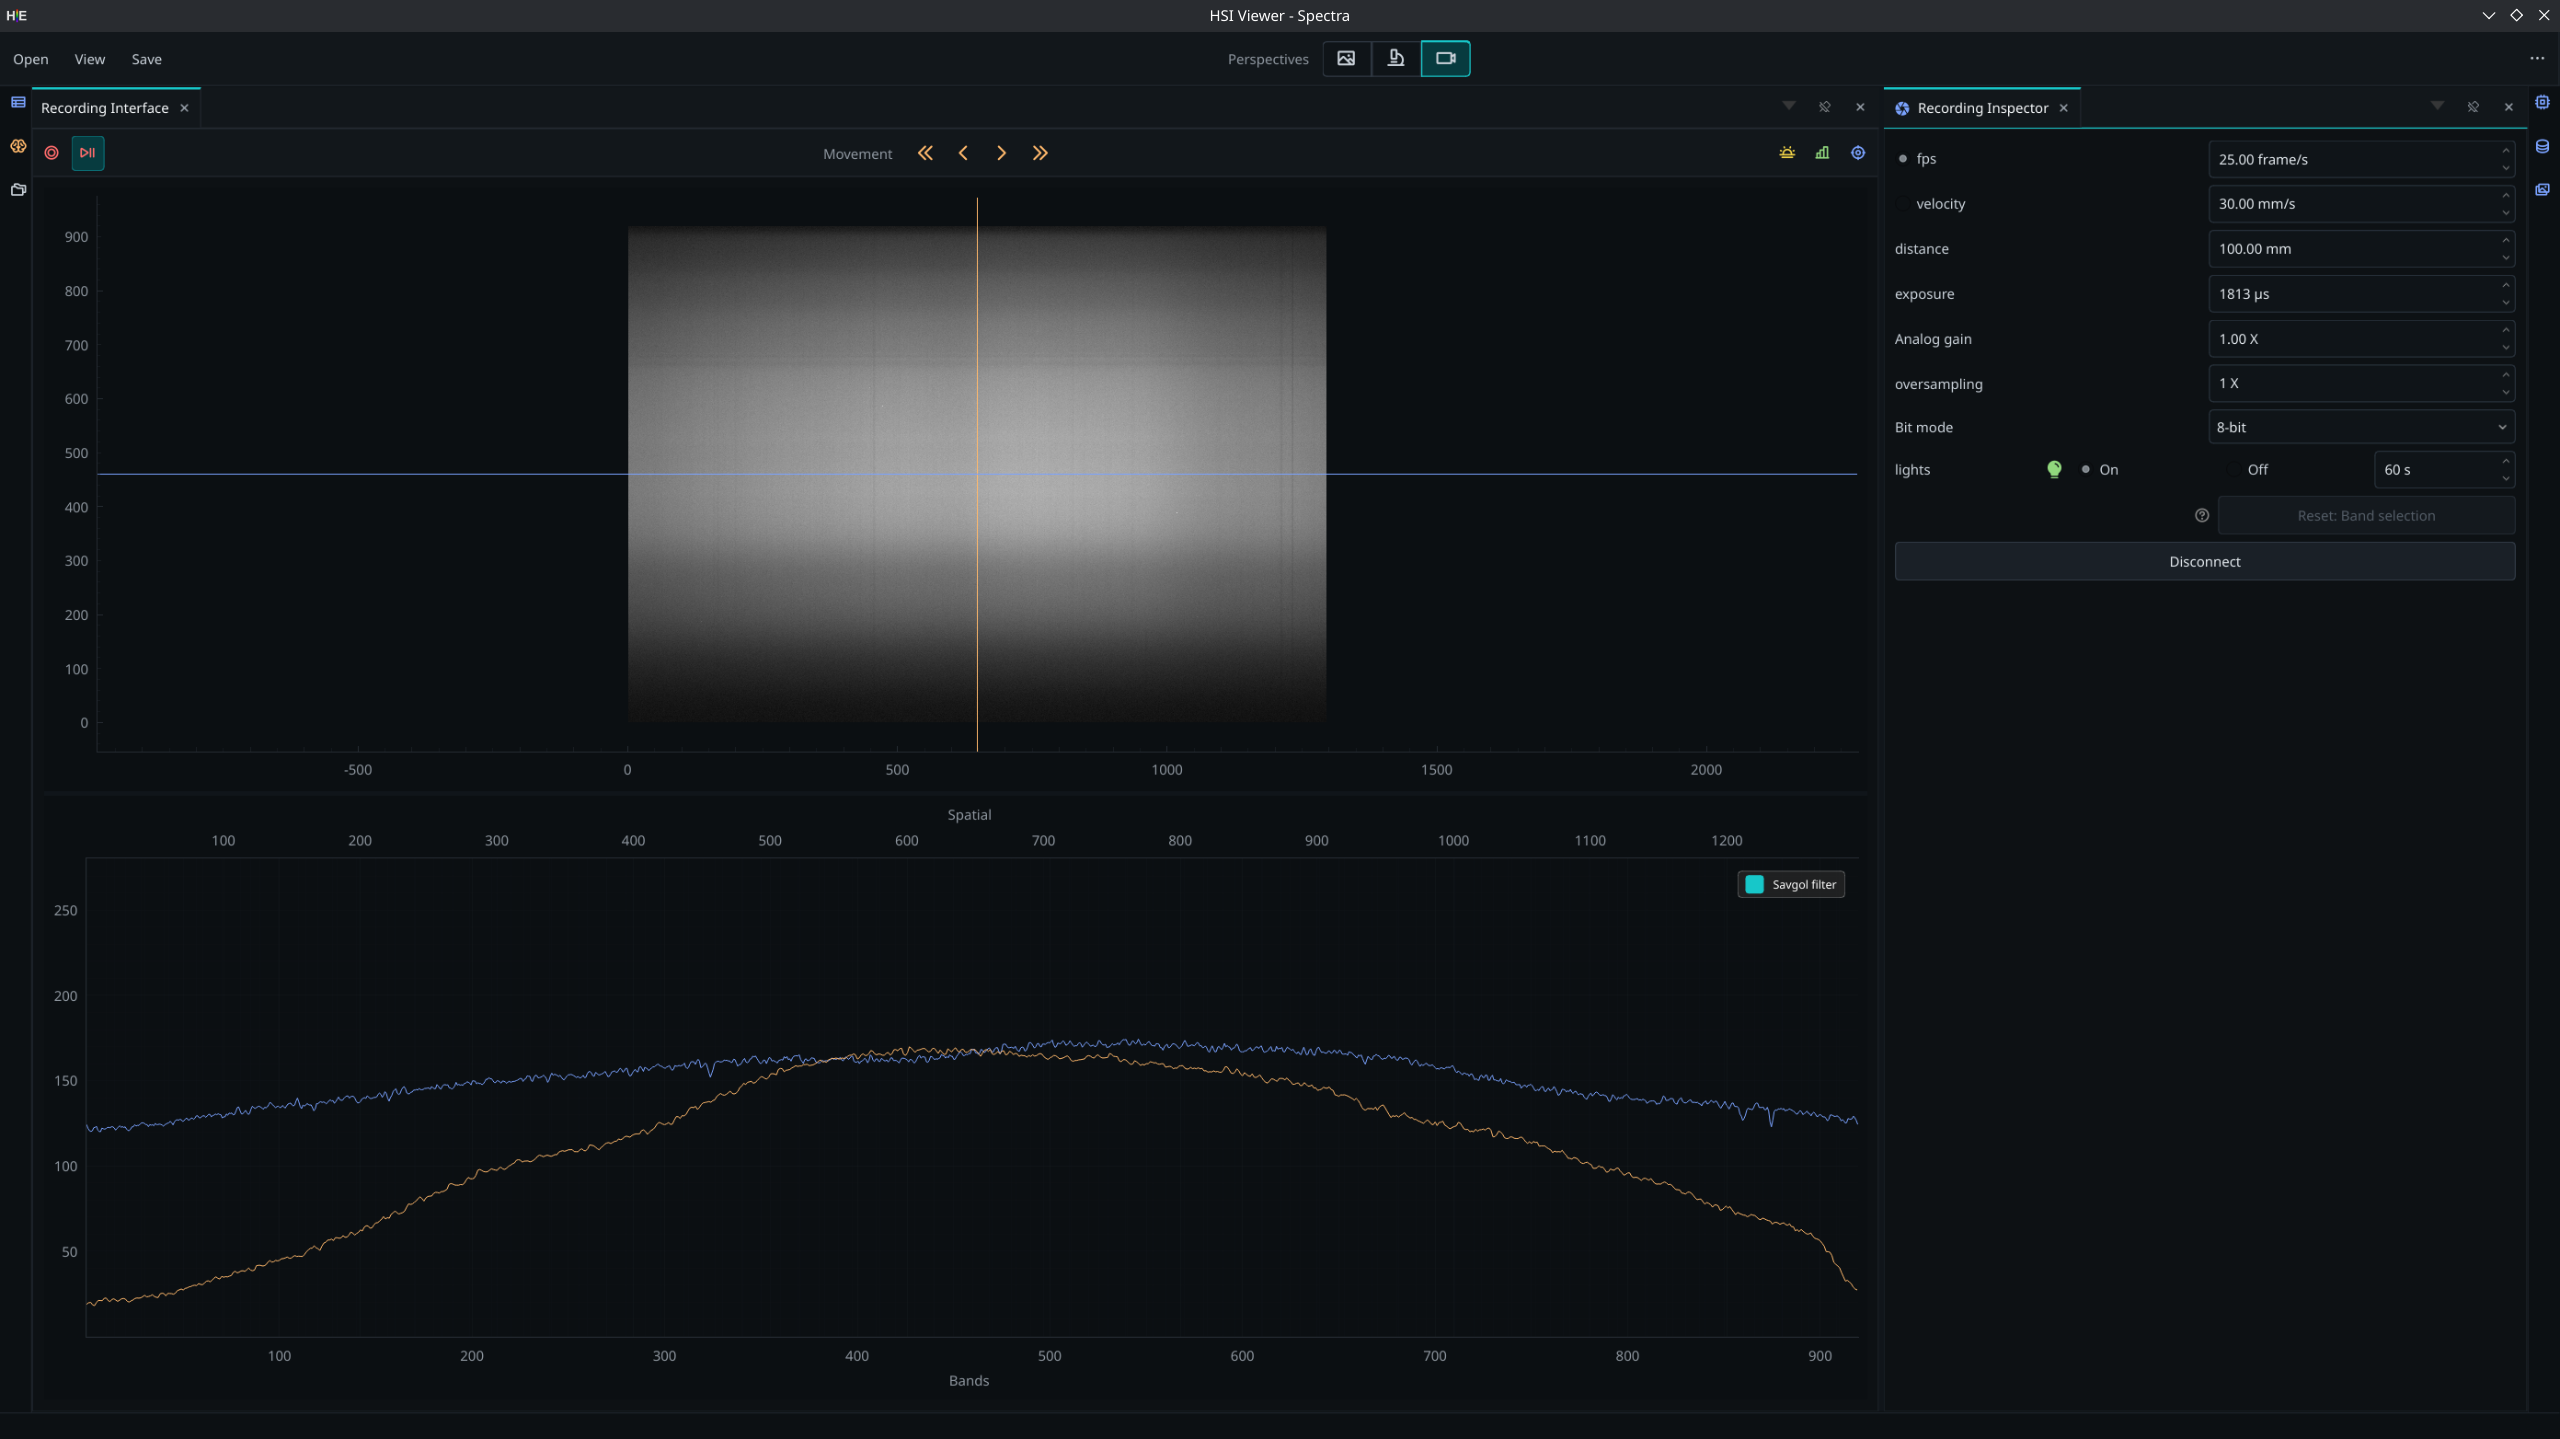
HV Explorer: recording interface streaming
The intensity graph also helps check the exposure. It shows intensity profiles sampled from the live view: one profile follows the vertical yellow line, and the other follows the horizontal blue line. Move these lines in the live preview to choose which image regions are plotted. Use the graph together with the histogram to check for overexposure, underexposure, and uneven illumination.
Saturation overlay visible — exposure too high:
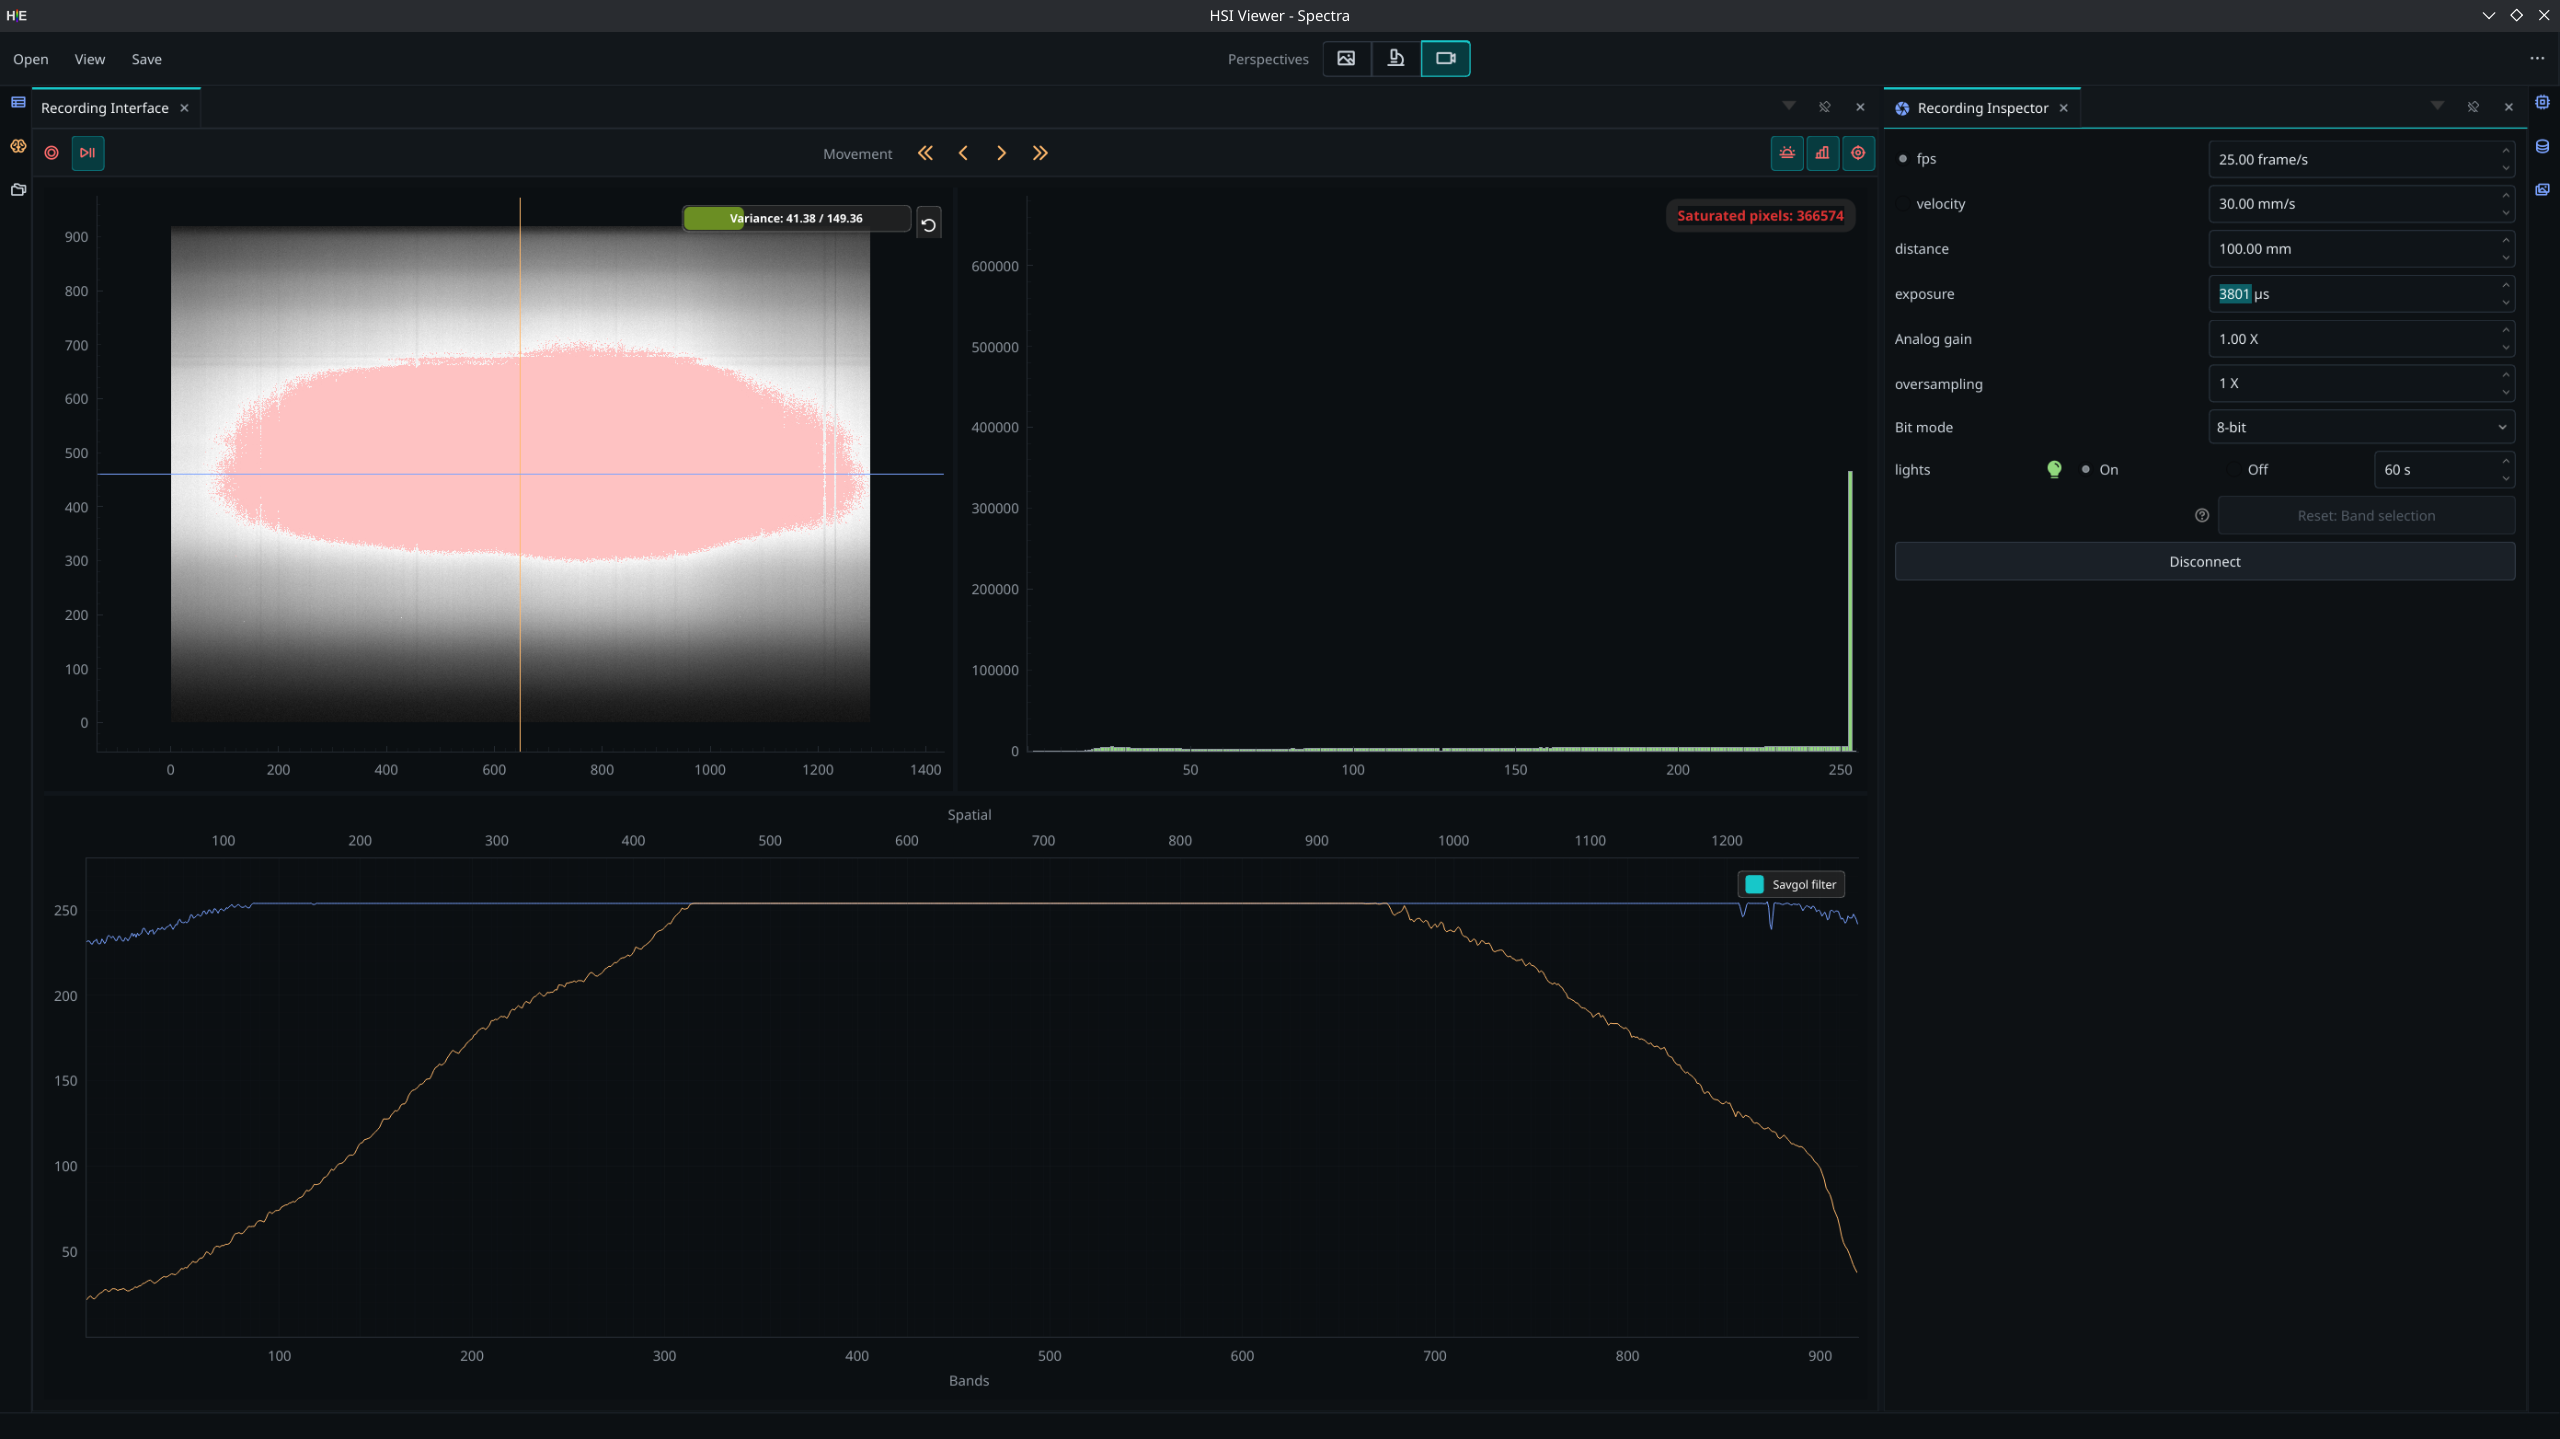
HV Explorer: recording interface with saturation overlay
When the exposure is too high, saturated pixels are highlighted in red in the live view. The histogram shows values piling up at the maximum level (255 for 8-bit), and the intensity graph may flatten near the top of the range. Reduce exposure or gain until the overlay disappears.
Low exposure — insufficient signal:
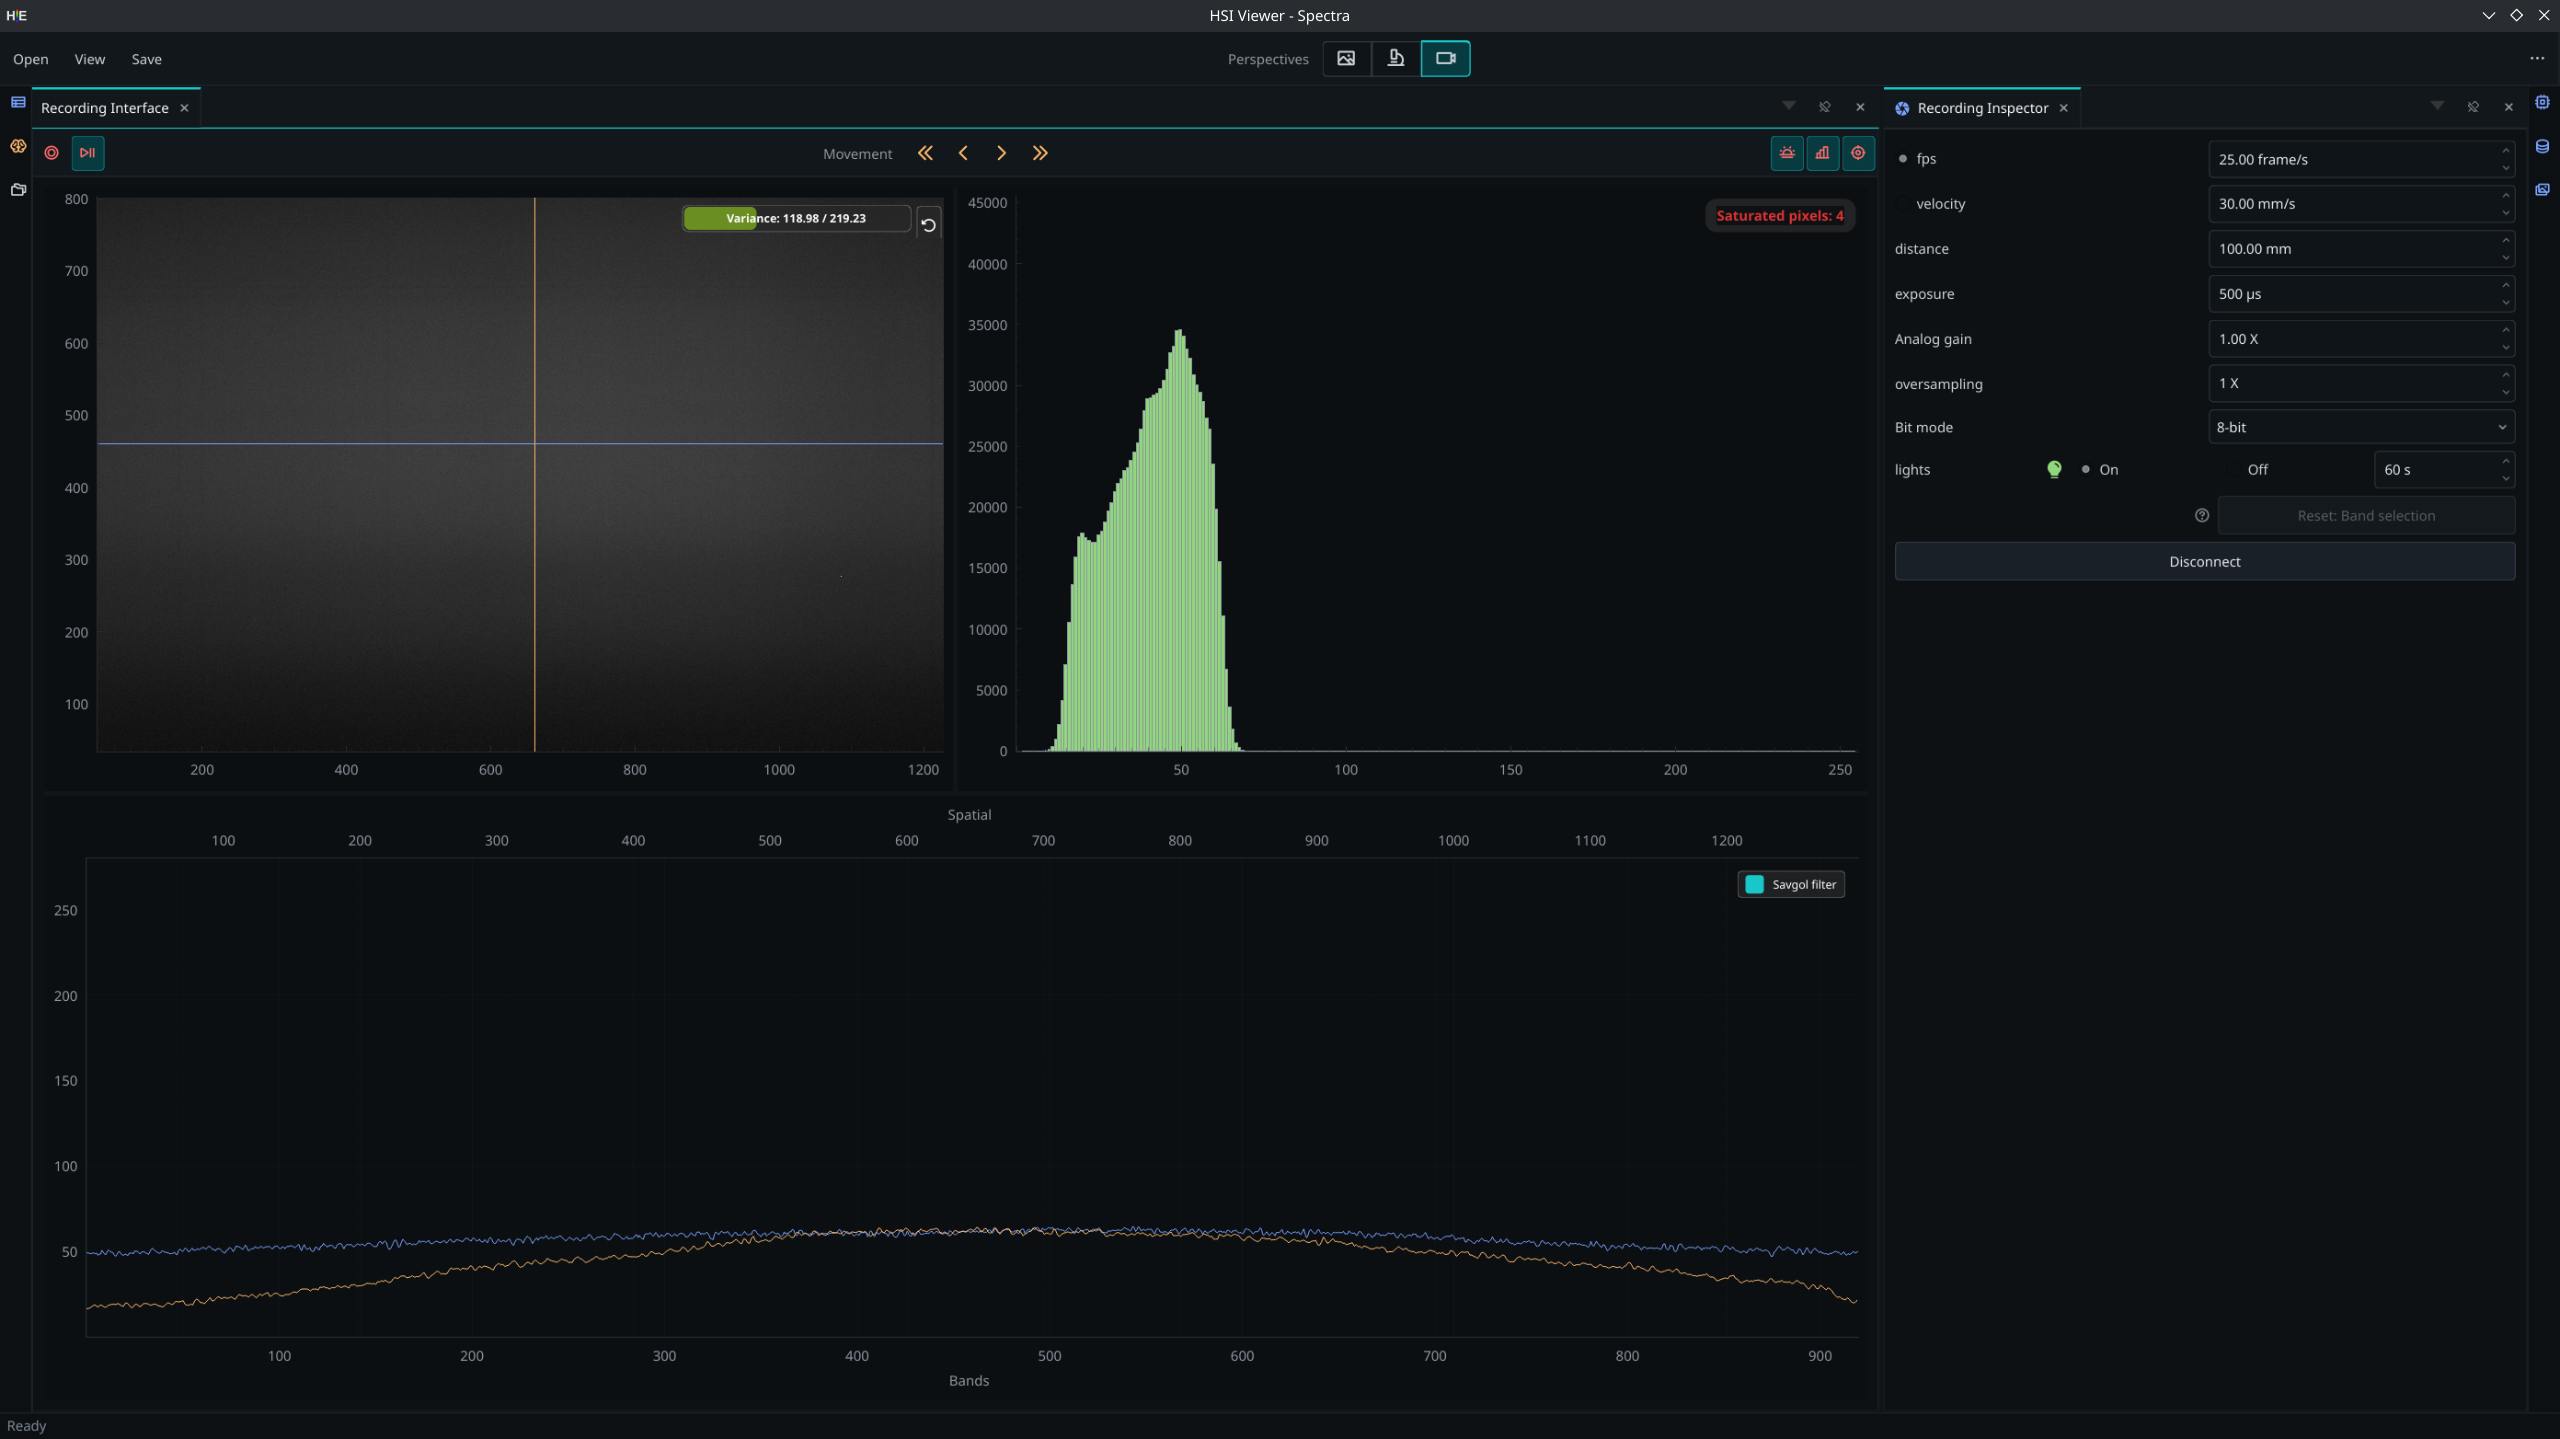
HV Explorer: recording interface with low signal
When exposure is too low, the histogram peak shifts toward zero and the intensity graph shows a weak, noisy signal. Increase exposure or gain until the signal reaches a useful level.
Well-exposed — no saturation:
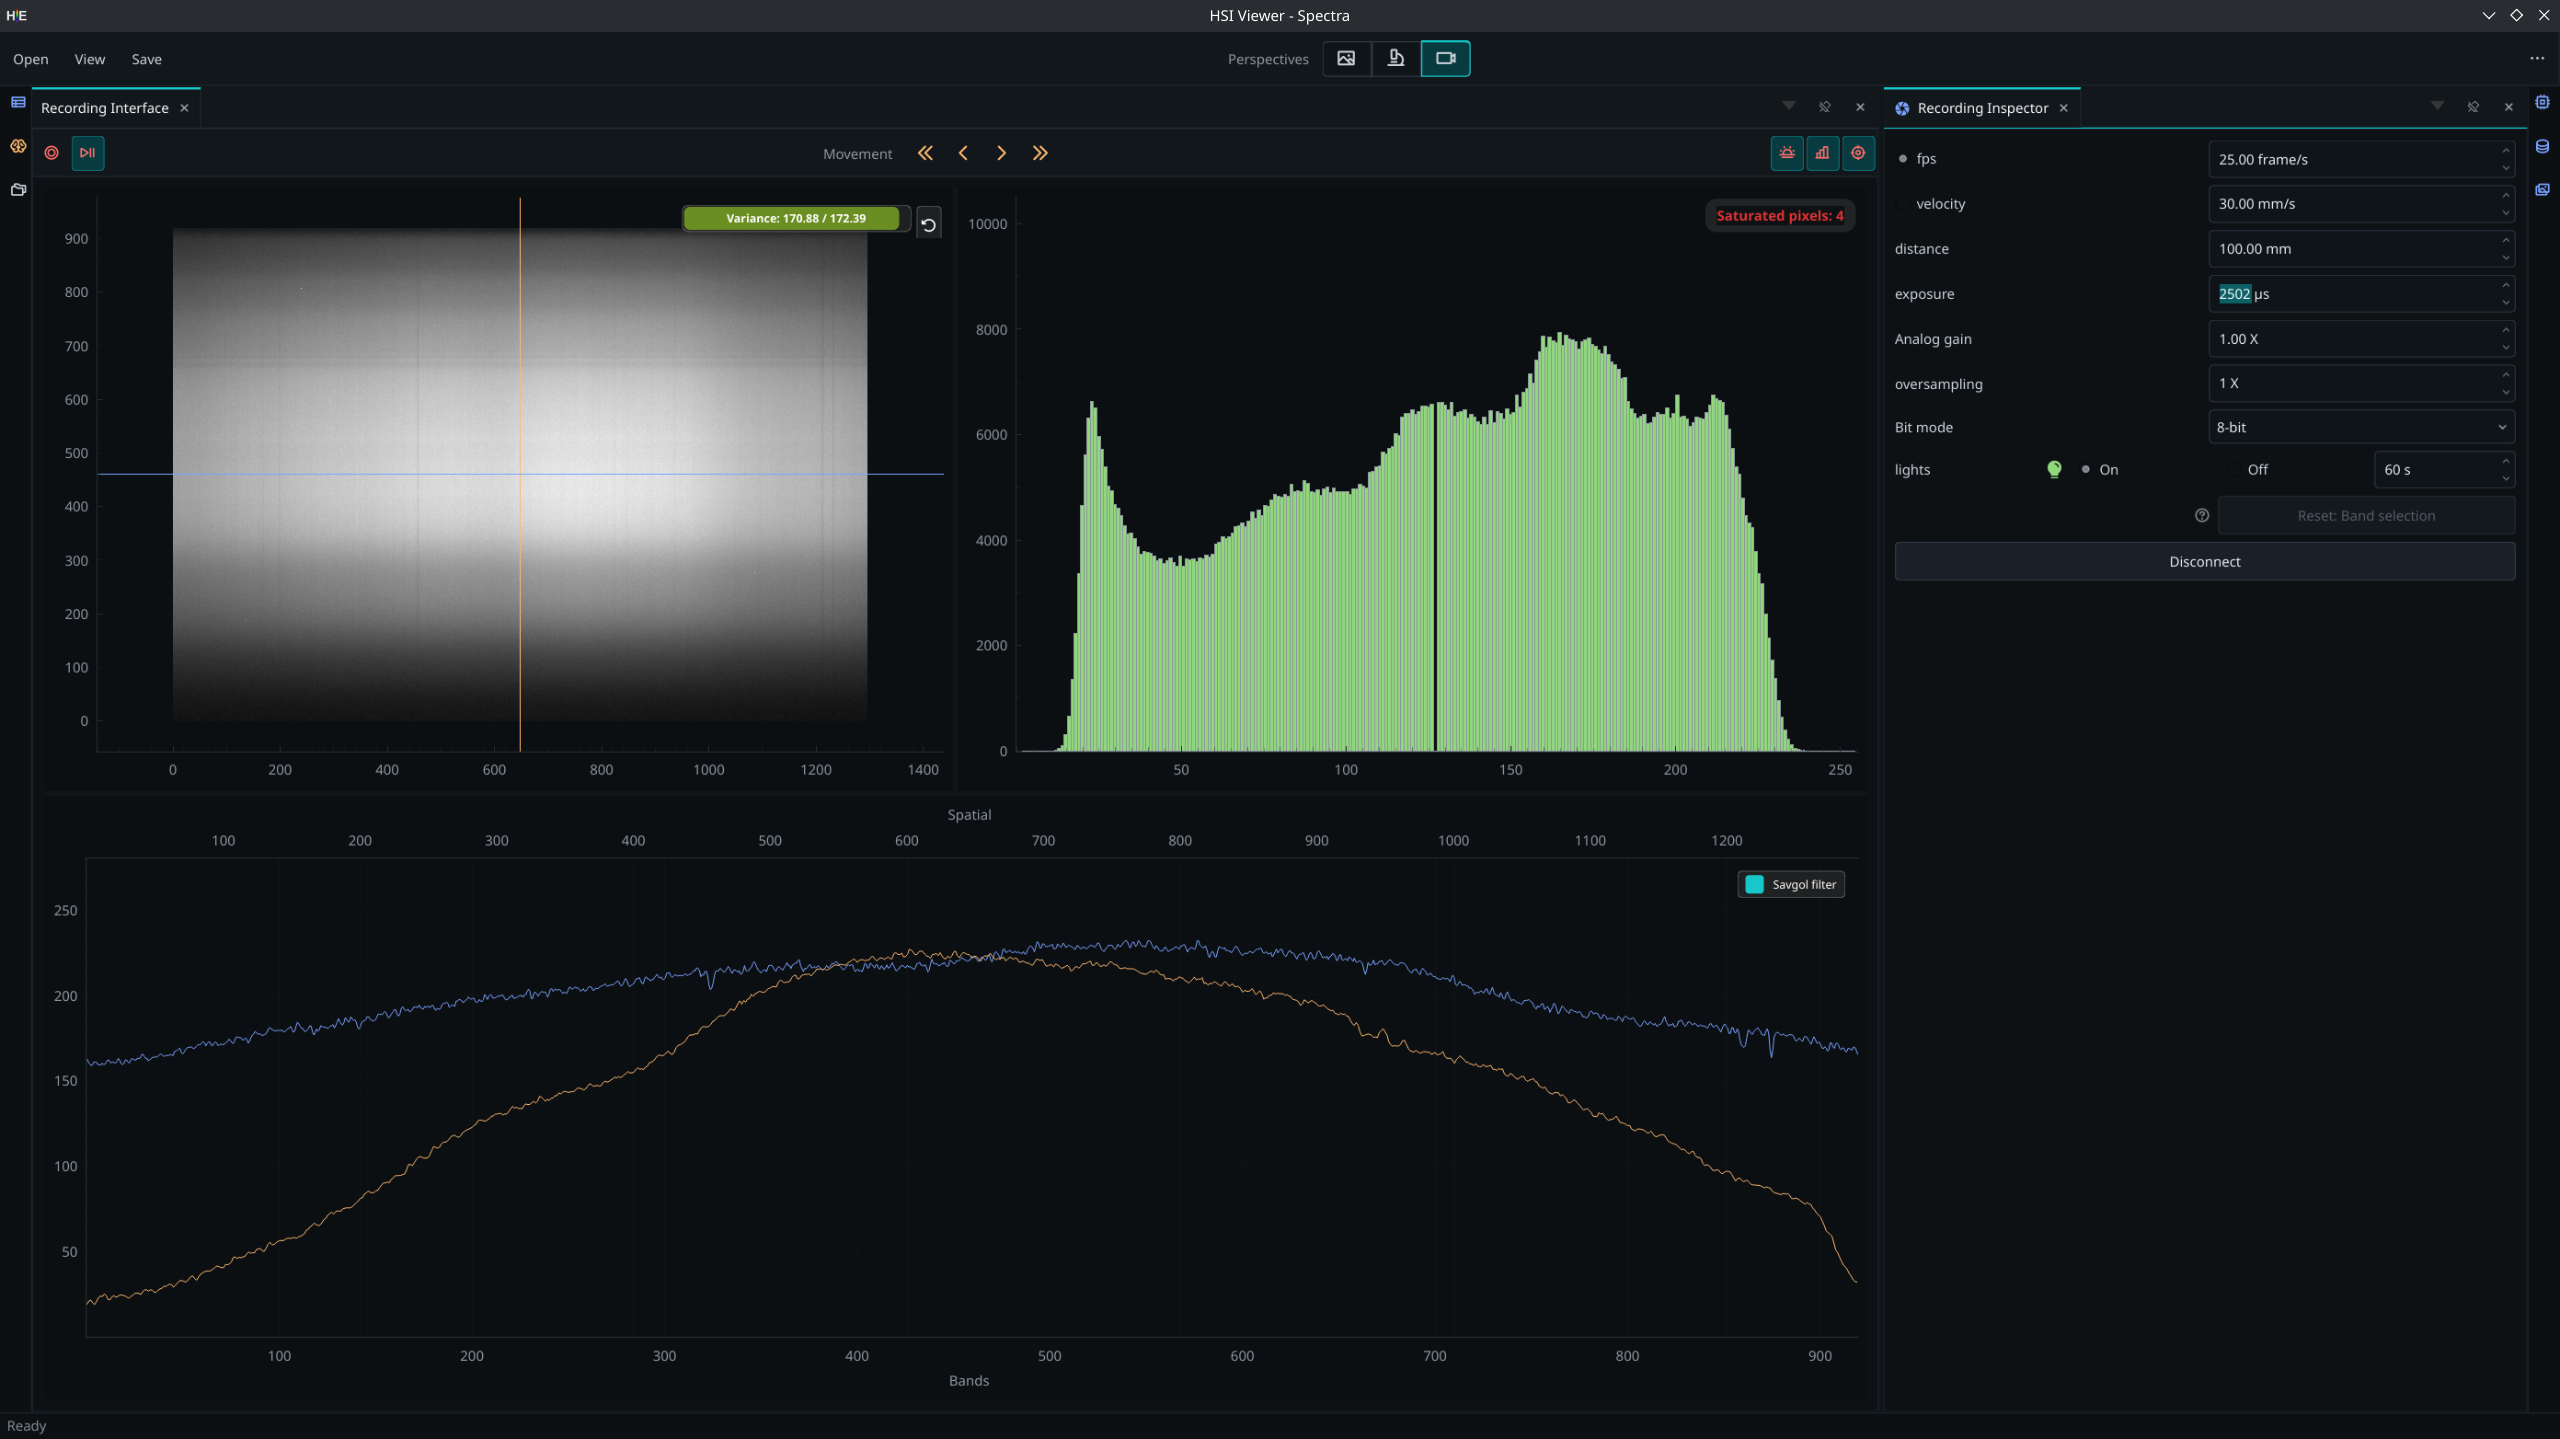
HV Explorer: recording interface, no saturation
The target exposure has the histogram filling most of the dynamic range without touching the maximum. The saturation counter shows zero and the intensity graph shows a smooth, strong response. This setting is ready for reference and sample capture.
Focus adjustment
After setting exposure and gain, stream the camera over a target with fine spatial detail — a sharp edge or a resolution target works well. HV Explorer displays a sharpness measure (variance of the spatial profile) in the live-view toolbar.
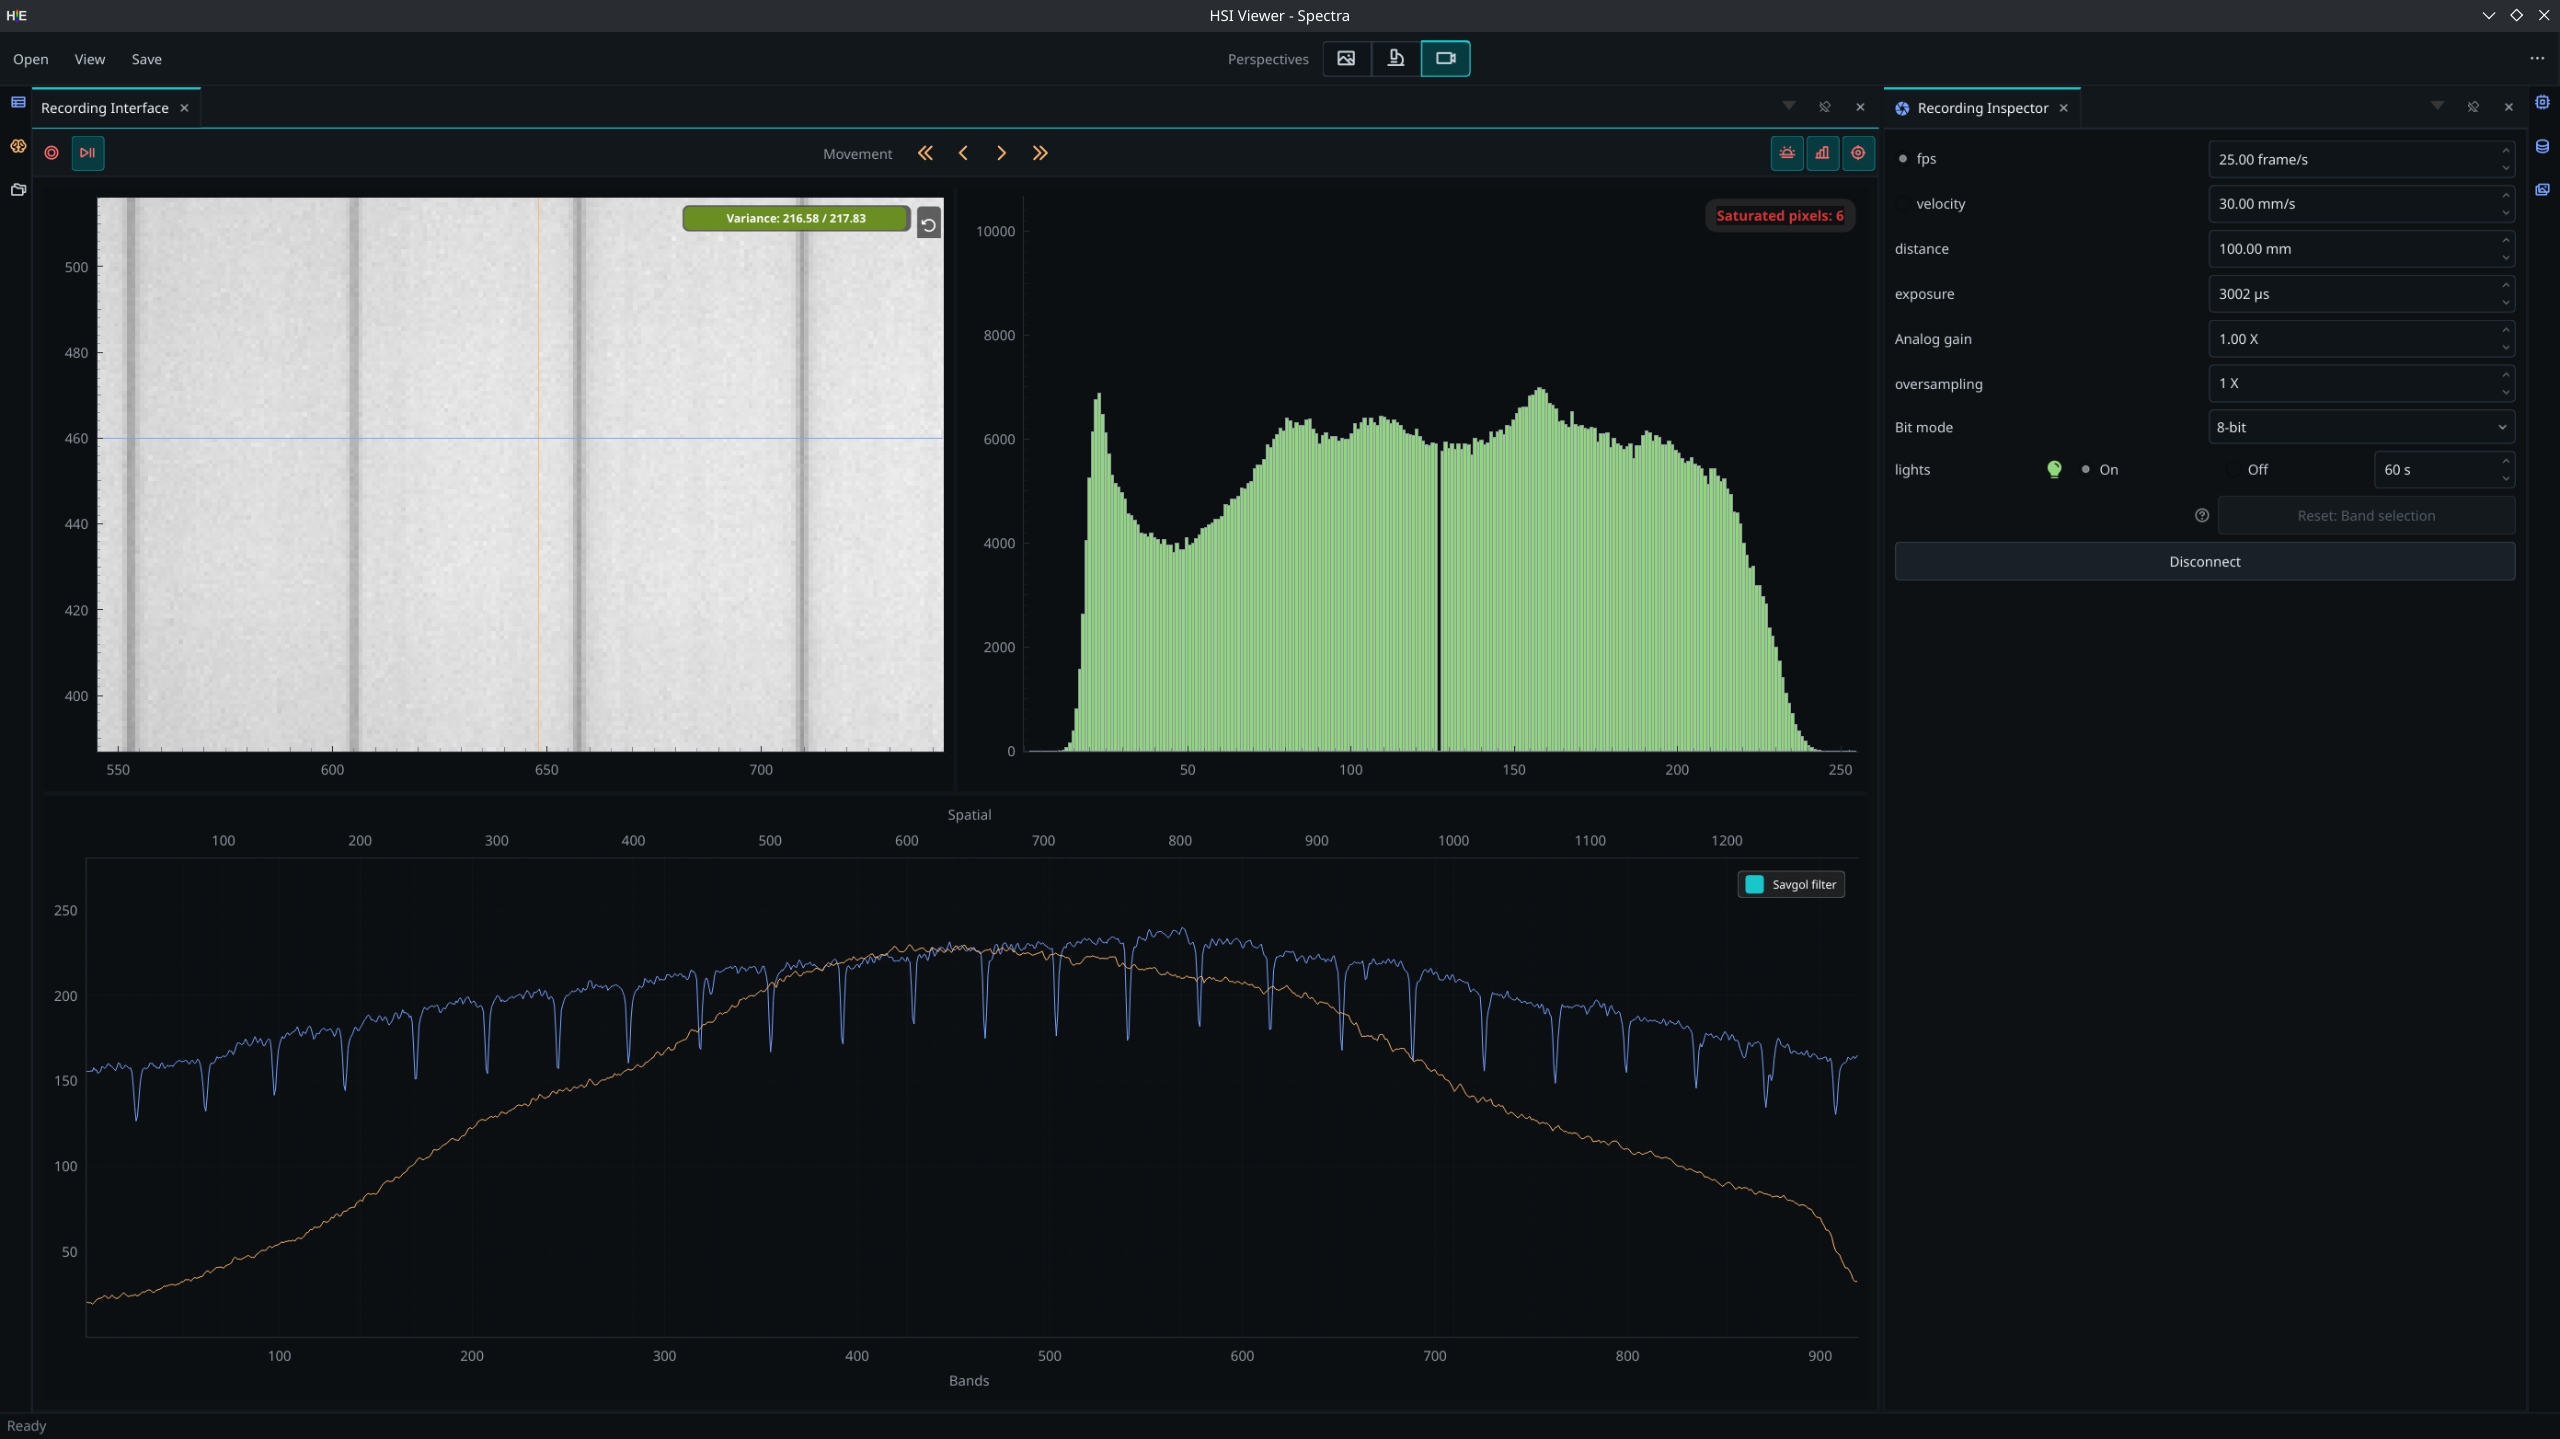
HV Explorer: recording interface focused
To focus:
- Start with the lens slightly de-focused so you have a clear baseline.
- Adjust the focus ring while watching the sharpness value in the toolbar.
- Stop when the sharpness measure reaches its maximum.
Beginning from a de-focused state makes it easier to detect the direction in which sharpness increases and avoids stopping at a local plateau short of the true focus peak.
Capture
With focus set and references captured, configure the capture parameters in the Recording Inspector and start recording:
- Set fps or velocity to match the desired spatial sampling.
- Set Oversampling based on the intended use: use 4 for a spatially correct aspect ratio (matching the 20 μm / 4 px slit), or a lower value such as 1 for a more compact cube when spatial proportions are less important.
- Press Record to start the capture. The datacube opens automatically in HV Explorer when recording is complete.
- Save the datacube immediately. HV Explorer does not auto-save; unsaved results are lost when the session closes.